Your first document: a 10-minute quickstart
This is the quickest way to get a feel for Scribe. In about ten minutes you will create a project, type the first paragraph, watch the live preview, and export a finished image.
Looking for the long walkthrough? Once you finish this page, Tutorial — your first Scribe document covers the same path with full screenshots, chapter structure, and every option explained.
Step 1 — Create a project
- Launch Scribe.
- On the welcome screen, choose New project.
- In the system folder picker, create or select an empty folder named
My First Book. - After Scribe opens the empty Project, choose New document in the left file tree and create your first chapter.
The Project name follows the selected folder name. Scribe stores the new document in that folder.
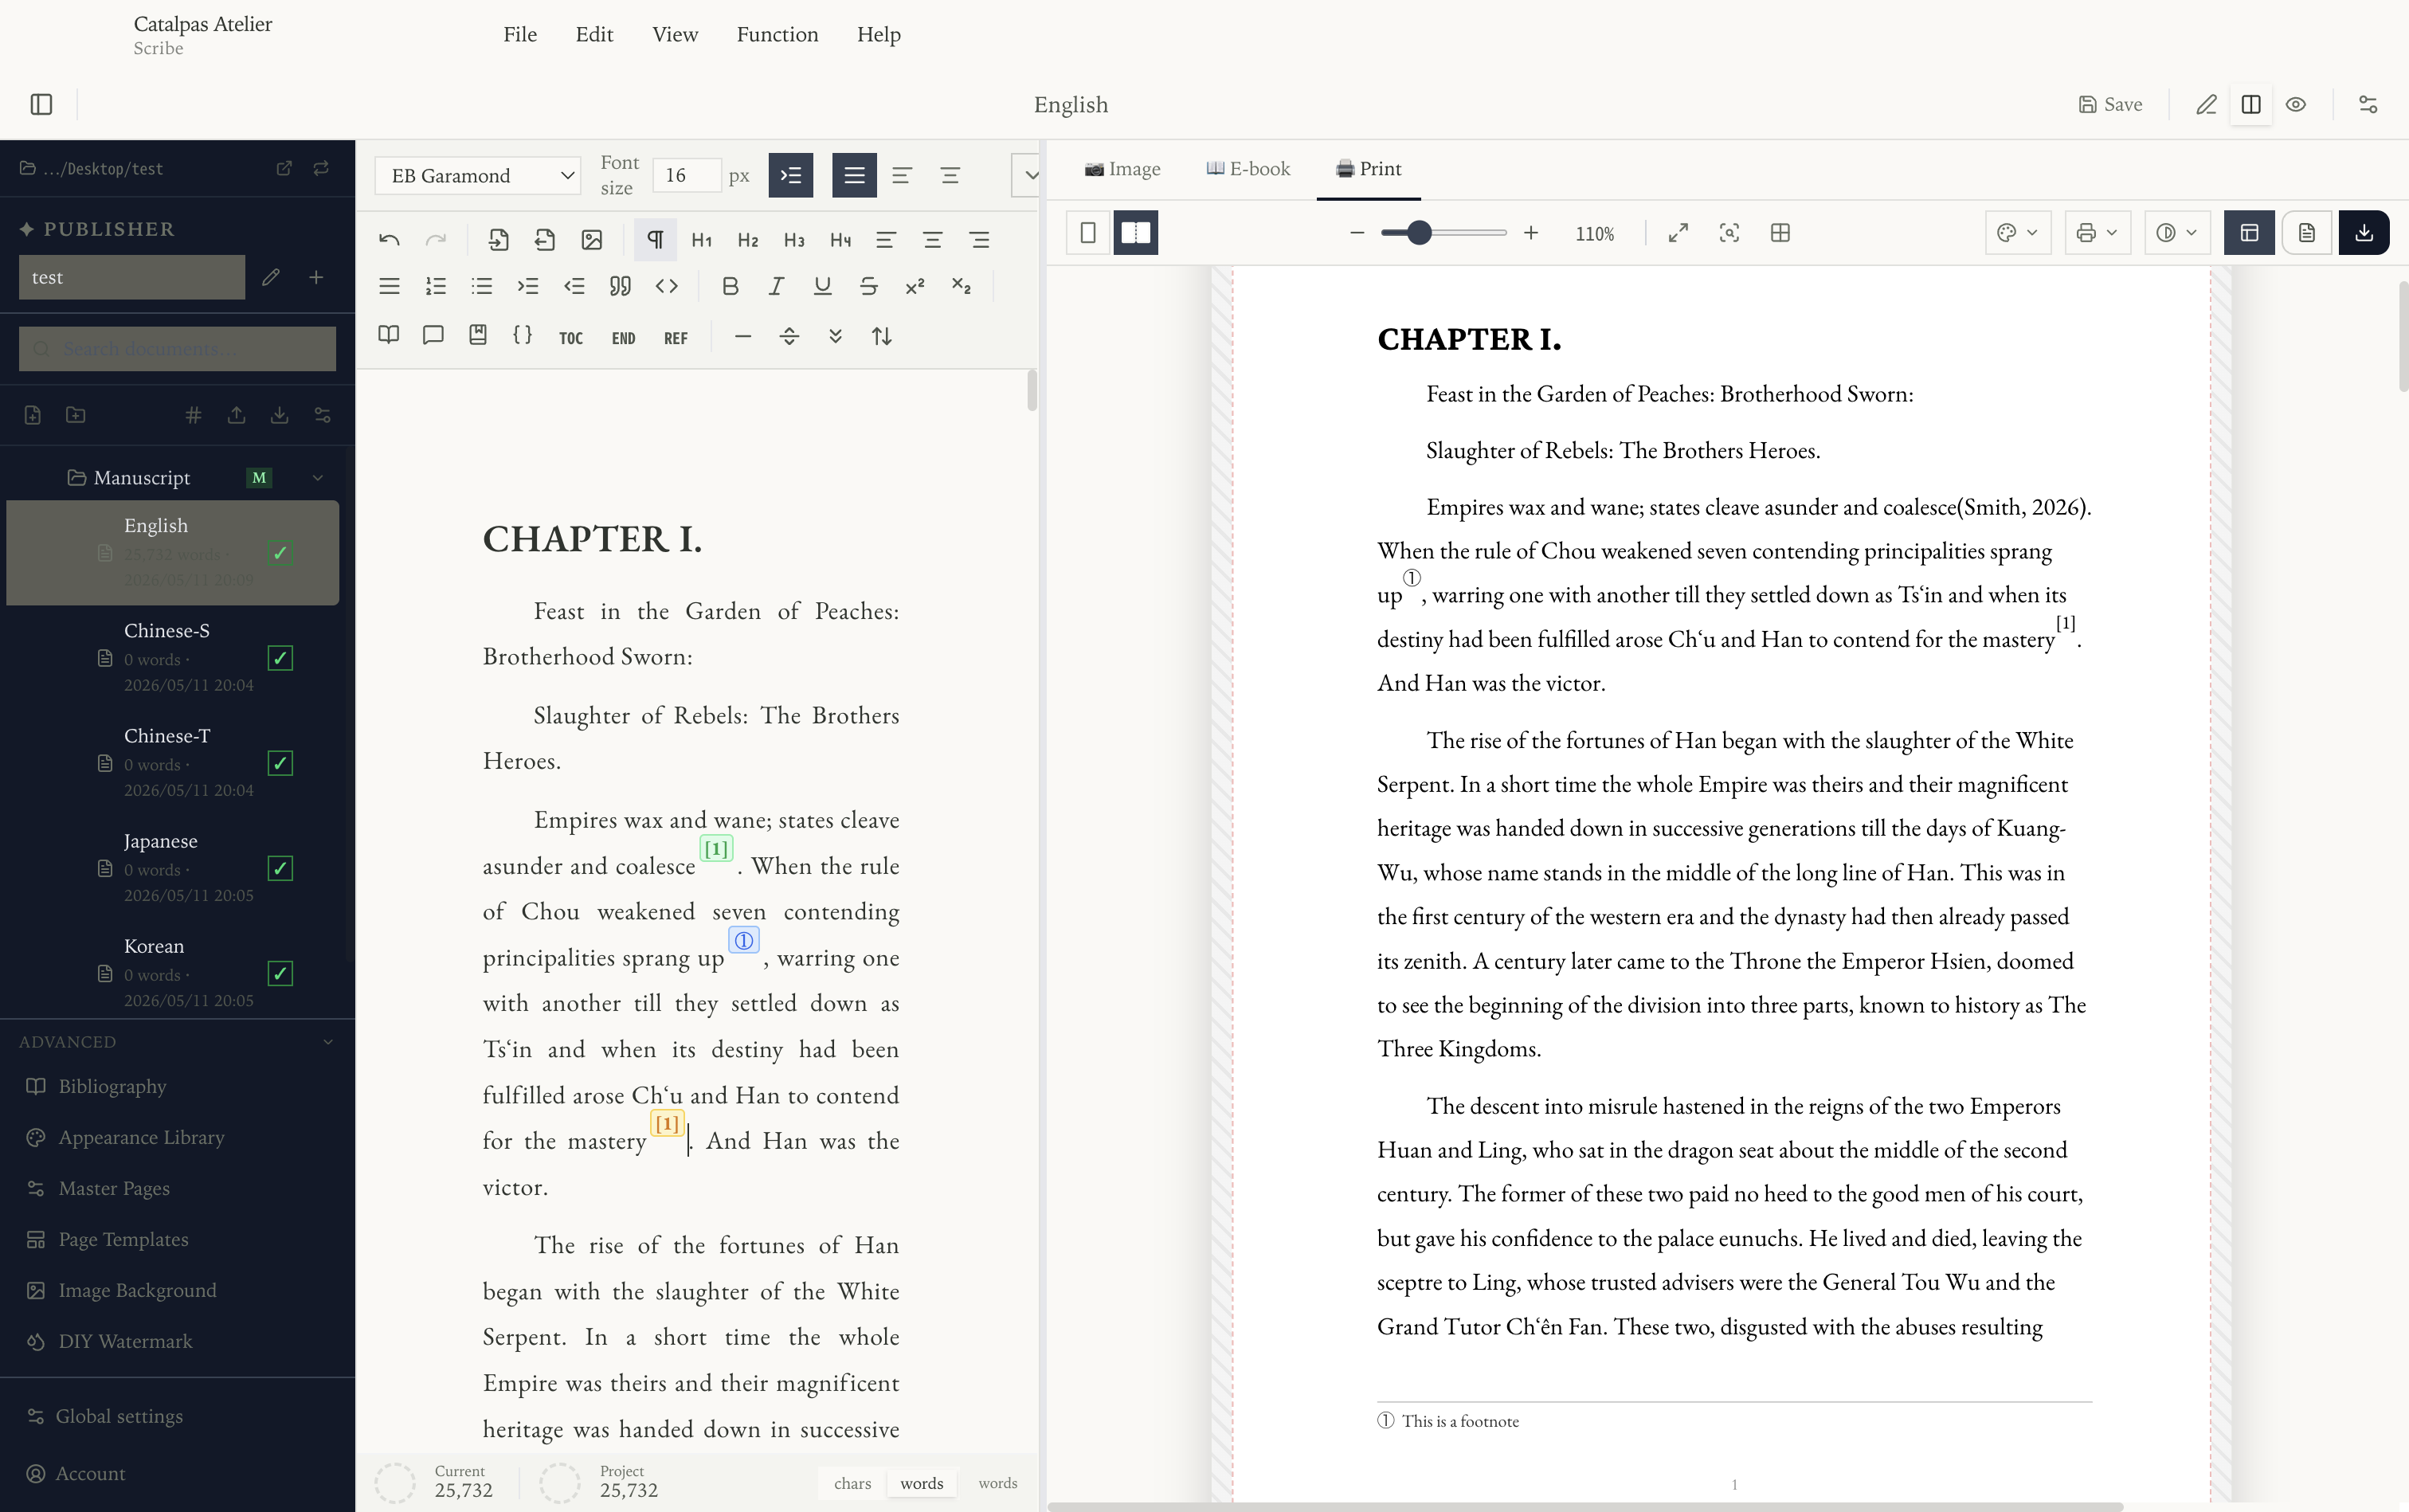
Step 2 — Write something
The pane on the left is the document tree. The pane in the middle is the editor. The pane on the right is the live preview.
Click into the editor and type a few lines. Try this:
# Chapter 1

The afternoon had the colour of weak tea, and the cat refused to
move from the windowsill.

She watched the cat for a long time, hands folded under her chin,
the way her grandmother used to.
As you type, the preview on the right updates in real time. By default the preview is in image mode, showing the page exactly as it would look when exported as an image.
Step 3 — Switch preview modes
Above the preview pane you'll see three toggles:
- Image — paged image output (what you see now).
- E-book — a flowing EPUB-style layout with no fixed page size.
- Print — a print layout with margins and headers.
Click each one. The text reflows for the new target. This is the same content rendered three different ways; the source Markdown does not change.
Step 4 — Insert an image
Place the cursor where you want the image, click Insert image in the editor
toolbar, choose Import from disk…, then select a .jpg, .jpeg, or .png
image. Scribe copies it into the project assets and inserts it at the current
cursor position.
Switch back to the image preview — the photo is now part of the page. Click the image to adjust its Inline width or switch it to a Full-page image.
Step 5 — Export
- Switch the preview to Image.
- In the right sidebar, set Export Mode to Paged images and choose PNG or JPEG.
- On the preview toolbar, open Choose export scope and select Current Document.
- Choose Export image, then select a save location.
If the document has several pages, Scribe saves the numbered images together in a ZIP archive. Open the result and check every page.
You have now completed your first image export on the Free plan. To go further:
- Learn the editor surface in detail — Editor basics.
- See what changes between Free, Plus, and Pro — Plans & features.
- Walk through every step with screenshots — Tutorial: your first Scribe document.