Your first Project
This quick start takes about ten minutes. By the end, you will have a local Project you can reopen, a prose document, and an event card. For a complete planning exercise, see Plan a novel from scratch.
Before you begin
- Complete Install and first launch.
- Sign in to Scroll.
- Prepare an empty folder and a working title.
1. Create a Project
- Select New Project on the welcome screen.
- In the system folder picker, create or choose an empty folder. Scroll uses the folder name as the default Project name.
- Wait while Scroll prepares the Project.
- When Set up this project for Scroll? appears, select Create.
- The Project workspace opens. Its file tree may be empty because Scroll does not create manuscript folders automatically.
Do not create a test Project inside a system folder, temporary directory, or a folder whose synchronization state is unclear. Selecting Not now postpones setup; Scroll may ask again when you first use templates, recoverable Trash, or another Project feature.
2. Find your way around
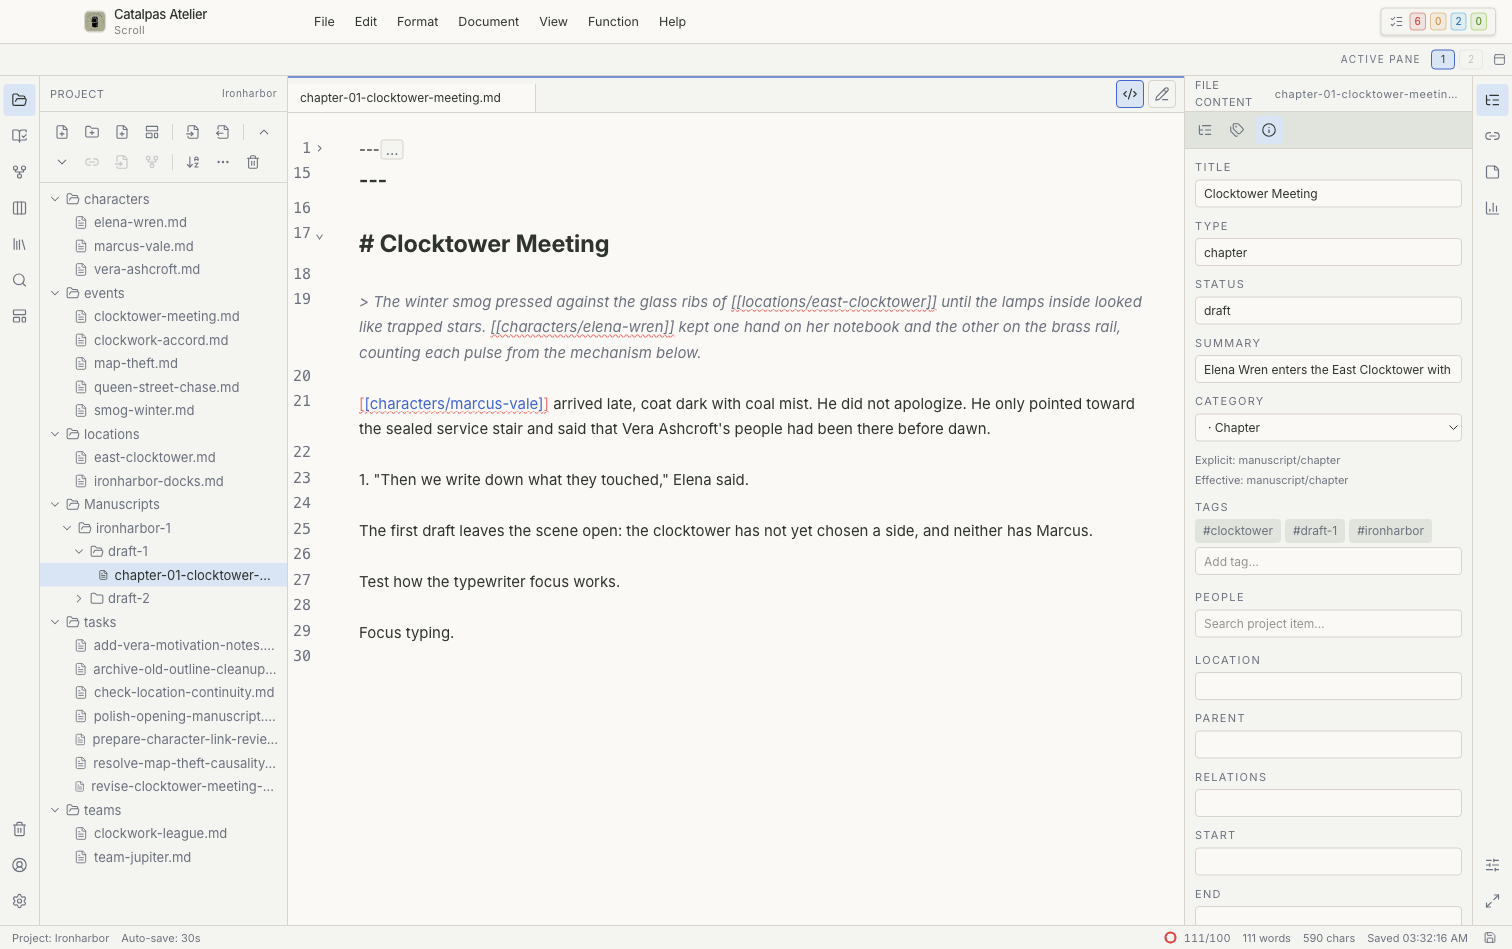
From left to right, the window contains:
- the activity bar, which switches workspaces;
- the workspace sidebar, which lists files, views, or records for the current workspace;
- the main workspace, where you edit prose and cards or use the selected workspace; and
- the inspector, which shows properties, relationships, an outline, statistics, and related files.
For a detailed tour, begin with the Workspace overview.
3. Create a prose document
- Open the Project workspace.
- Select New Folder and create a
manuscriptfolder. - Select that folder, then use New File to create a Markdown document.
- Add a title and a short paragraph.
- Press
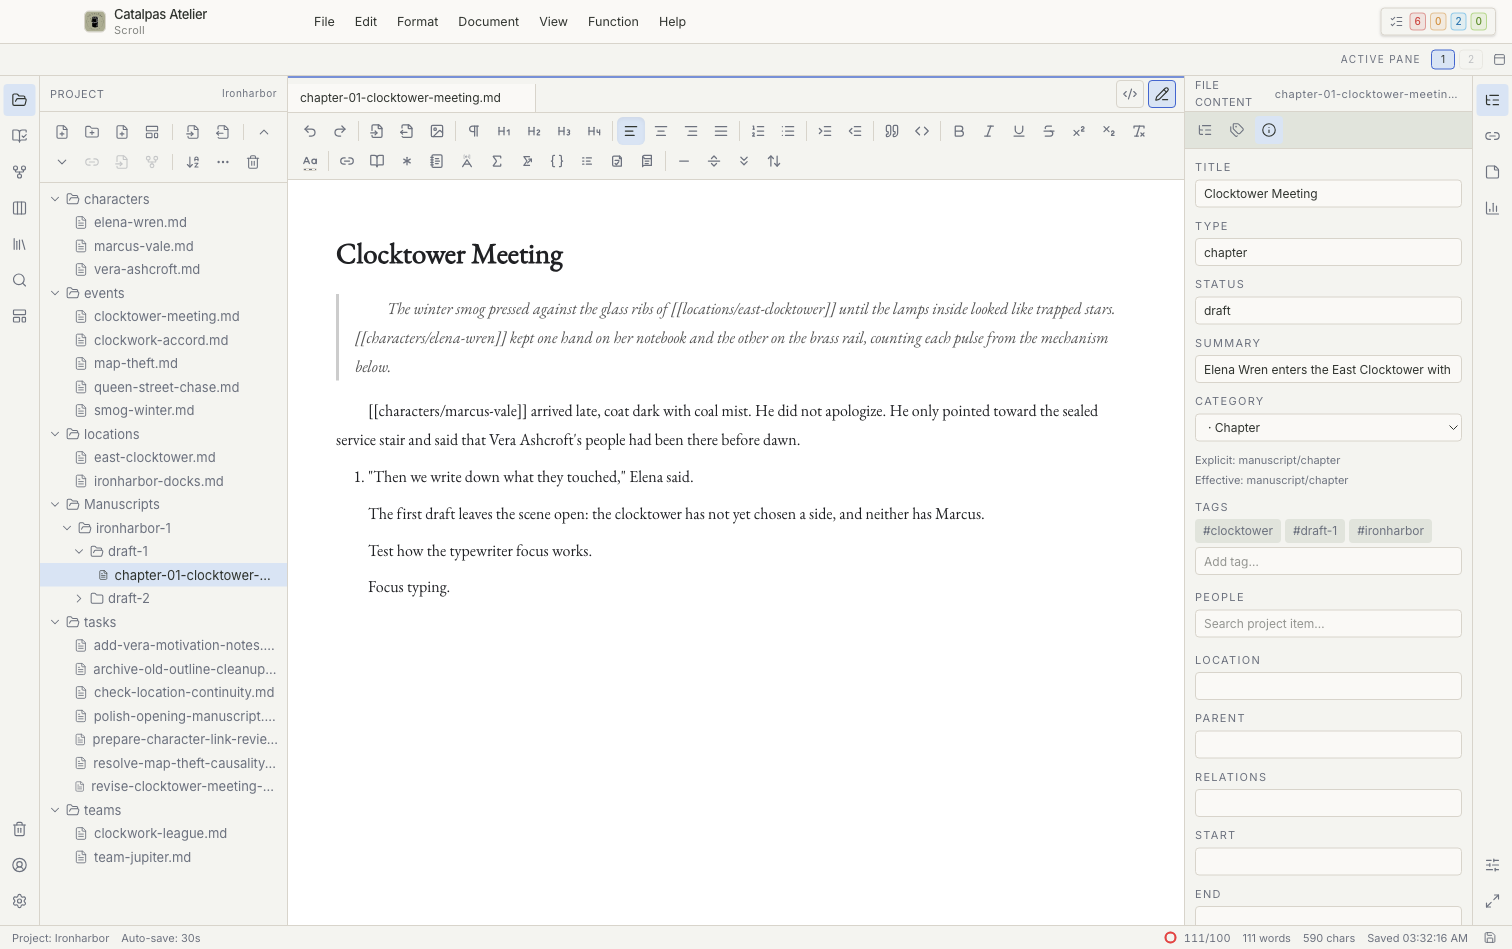
Cmd + Son macOS orCtrl + Son Windows and Linux. - Switch once between Source view and Visual Mode to confirm that both edit the same content.
4. Create a Story card
- Open Story and select Create story item.
- Choose the built-in Event template.
- Enter a title and start date. Add characters and a location if useful.
- Save the card, then open a Timeline Story view and confirm that the event appears at the expected date.
If the Timeline is empty, check the event date and current filters before creating another card.
5. Close and reopen the Project
- Confirm that the editor no longer shows an unsaved state.
- Close the Project.
- Reopen it from Recent Projects.
- Confirm that the prose document and event card are still present.
What you have learned
You can now create a Project, identify the main interface areas, save prose, and inspect planning data in a Story view. Continue with one of these tutorials: